Using Windows Installer (WIX) to schedule a task as the system user

Goal: use WIX to schedule a task via the task scheduler. The task must run every 30 minutes after the computer starts, it must also run as the SYSTEM user.

Answer:

<Product Id="*" 
  Name="FooBar" 
  Language="1033" 
  Version="1.0.0.0" Manufacturer="Foo" 
  UpgradeCode="GID">
<Package Id="*" 
  InstallerVersion="200" 
  Compressed="yes" 
  InstallScope="perMachine" 
  InstallPrivileges="elevated"/>
     

<InstallExecuteSequence>
      <Custom Action="CreateScheduledTask" After="InstallFiles">
        NOT Installed
      </Custom>
</InstallExecuteSequence>

<CustomAction Id="CreateScheduledTask" 
    Return="check" 
    Impersonate="no" 
    Execute="deferred"
    Directory="TARGETDIR" 
    ExeCommand="&quot;[SystemFolder]SCHTASKS.EXE&quot; /CREATE /SC MINUTE /MO 20 /TN &quot;Foobar&quot;  /TR &quot;&quot;[INSTALLFOLDER]\Foobar.exe&quot;&quot; /RU &quot;NT Authority\System&quot; /RP /RL HIGHEST" />
</Product>

Explanation:

To schedule a task you need to create a custom action which calls the command line version of the Windows Task Scheduler (schtasks.exe). In the example above the task is being scheduled to run every 20 minutes starting from when the computer boots (/SC MINUTE /MO 20).

The tricky part is making the new scheduled task run as the SYSTEM user with the highest permissions possible (/RU “NT Authority\System” /RP /RL HIGHEST”). To do this the installer itself must run with elevated privileges AND the CustomAction must run with elevated privileges. To run the installer with elevated privileges I added InstallPrivileges=”elevated” to the Package element. To run the CustomAction with elevated privileges I added Impersonate=”no” and Execute=”deferred” to the CustomAction element. Aaron Stebner explains why deferring the action is necessary. Also note that the use of ‘&quot;’ instead of ‘”‘ is a feature of WIX and not an error in web formatting.

This solution works, but it is limited by the number of parameters schtasks will take in. This prevents you from doing things like disabling the AC Power requirement. Here is an explanation of how to do that.

Getting rid of the black boxes

Another issue is that a command prompt pops up briefly making the install look messy. To solve the issue you have to use a Quiet Execution Custom Action.

<Product Id="*" 
  Name="FooBar" 
  Language="1033" 
  Version="1.0.0.0" Manufacturer="Foo" 
  UpgradeCode="GID">
<Package Id="*" 
  InstallerVersion="200" 
  Compressed="yes" 
  InstallScope="perMachine" 
  InstallPrivileges="elevated"/>
     

<InstallExecuteSequence>
      <Custom Action="CreateScheduledTask" After="InstallFiles">
        NOT Installed
      </Custom>
      <Custom Action="CreateScheduledTaskId" After="CostFinalize">
        NOT Installed
      </Custom>
</InstallExecuteSequence>

<CustomAction Id="CreateScheduledTaskId" 
    Property="CreateScheduledTask"
    Execute="immediate"
    Value="&quot;[SystemFolder]SCHTASKS.EXE&quot; /CREATE /SC MINUTE /MO 20 /TN &quot;Foobar&quot; /TR &quot;&quot;[INSTALLFOLDER]\Foobar.exe&quot;&quot; /RU &quot;NT Authority\System&quot; /RP /RL HIGHEST" />

<CustomAction Id="CreateScheduledTask" 
    Return="check" 
    Impersonate="no" 
    Execute="deferred"
    BinaryKey="WixCA"
    DllEntry="CAQuietExec" />
</Product>
 

Publicly avalible datasets

I teach a class on Processing, which is a simplified version of Java designed to enable people to easy create graphics. My class focuses on data visualization. Below is my list of publicly available data sets which I encourage my students to use in their visualizations.

IMDB

IMDB is a website that maintains a list of movies, actors, actresses, and information about them. They offer a set of downloadable information sets. The sets can be a bit challenging to parse though, so there also exists some Perl parsing scripts.

Other

StackOverflow has a list of publicly available data sets.

Sony utility disables UAC

Sony Hotkeys Utilities (SOAOTH-606A0000-0042.exe) disables User Account Control (UAC) on my Windows 7 machine.

After re-installing Windows 7 on my Sony laptop I wanted to make my hotkeys (like volume) work again so I installed the Hotkeys utility by Sony. A few weeks later I got suspicious when several programs I opened had “Administrator:” in the title when I hadn’t approved any UAC. I checked my logs and the last program to ask for privilege elevation was the Hotkey utility.

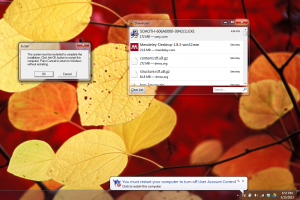
I re-enabled UAC dialogs and re-booted the machine. I re-downloaded the utility from Sony, installed it, and was asked to approve a UAC dialog (so UAC was definitely enabled). Sony software asked that I reboot the machine to “finish installation.”  Immediately after the Sony dialog appeared a balloon in the bottom right appeared with the following text: “You must restart your computer to turn off User Account Control.” Sony’s software was the only thing running and I hadn’t opened any User Account Control settings since restarting the computer.

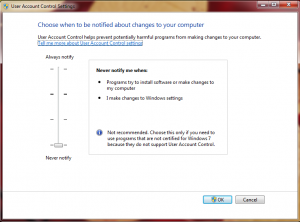
Sony_post_install

Sony_post_install_zoomed

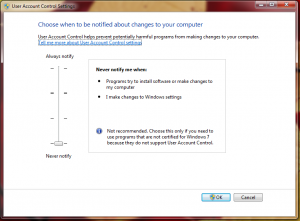
I let the software reboot the computer. After the reboot Sony software continued to install itself. I opened the User Account Control settings panel and verified that UAC was disabled.

Sony_post_reboot

Sony’s software finished installing itself, theoretically requiring UAC to do so, and asks to reboot a second time. I allowed it to reboot the machine and after the second reboot I pulled up the UAC settings again to verify that they were still disabled. As can be seen below the settings stayed with UAC disabled after two reboots.

Sony_post_reboot2

Turning off UAC dialogs without user notification is a very dangerous thing to do. My computer spent several weeks in a state where any program that wanted to install could just do so without my approval. My programs were running with “Administrator” in the title because they were running with Administrator privileges (I manually verified this for PowerShell). No well behaved software should ever change security settings on a computer without notifying the user.

A couple of limitations to consider

  • This is one personal computer, it is possible that the Sony utility is reacting badly with my computer’s setup.
  • I tried the above steps three separate times, this is repeatable (at least on my machine).


Importing and exporting csv files in MySQL

To import/output csv you need some permissions. As root on mysql run the following code:


> grant all privileges
on YOUR_DATABASE.*
to 'YOUR_USER'@'localhost'
identified by 'your_password';
> GRANT FILE ON *.* TO 'YOUR_USER'@'localhost';
> flush privileges;

Exporting CSV from MySQL

For security reasons mysql can only export files to a limited number of directories, this is especially true with Ubuntu which now uses AppArmor. You can change permissions to get around the security restrictions, but it is a major headache. It is much easier to export the file to /tmp and then move it.

To export into the /tmp directory use the following MySQL command. Make sure to replace “database.table_name” with your database and table name.

select * into outfile '/tmp/outfile.csv' FIELDS TERMINATED BY ',' ENCLOSED BY '"' ESCAPED BY '\\' LINES TERMINATED BY '\n' from database.table_name;

Now move the file from /tmp to your favorite directory:


cp /tmp/outfile.csv /home/kami/data/

Unfortunately there is no way to remove /tmp/outfile.csv without using sudo.

Importing a csv file into MySQL

For security reasons the ability to load files from the local directory is disabled by default. To temporarily override this restriction use the “–local-infile=1” parameter when starting MySQL.


mysql --local-infile=1 -u USERNAME -p DATABASE

Lets say my csv file out.csv looked like the following:

a,b,c
1,2,3
2,2,3
2,3,4

The MySQL table I want to load the file into is called my_table and has columns a,b,c,d. I would use the following MySQL command.


LOAD DATA local INFILE '/home/kami/outfile.csv'
INTO TABLE my_table
FIELDS TERMINATED BY ','
ENCLOSED BY '"'
ESCAPED BY '\\'
LINES TERMINATED BY '\n'
IGNORE 1 LINES
(a,b,c);

This command will load the csv file ‘/home/kami/outfile.csv’ into the columns a, b and c in table my_table. It will also ignore the first row.

Further Reading

  • http://stackoverflow.com/questions/2783313/how-can-i-get-around-mysql-errcode-13-with-select-into-outfile
  • http://stackoverflow.com/questions/6091427/mysql-into-outfile-access-denied-but-my-user-has-all-access-and-the-fold

Verifying certificate fingerprint

When opening pidgin on Ubuntu Linux I received the following warning dialogue with the message “Accept certificate for gmail.com?”. Clicking on “View Certificate” showed the second dialogue.

So how do you verify this?

To start with get the actual certificate from gmail and put it in a file

> openssl s_client -connect gmail.com:443 > cert.pub

The file contents should look something like this:

CONNECTED(00000003)
 depth=1 C = ZA, O = Thawte Consulting (Pty) Ltd., CN = Thawte SGC CA
 verify error:num=20:unable to get local issuer certificate
 verify return:0
 ---
 Certificate chain
  0 s:/C=US/ST=California/L=Mountain View/O=Google Inc/CN=mail.google.com
    i:/C=ZA/O=Thawte Consulting (Pty) Ltd./CN=Thawte SGC CA
  1 s:/C=ZA/O=Thawte Consulting (Pty) Ltd./CN=Thawte SGC CA
    i:/C=US/O=VeriSign, Inc./OU=Class 3 Public Primary Certification Authority
 ---
 Server certificate
 -----BEGIN CERTIFICATE-----
 MIIDIjCCAougAwIBAgIQK59+5colpiUUIEeCdTqbuTANBgkqhkiG9w0BAQUFADBM
 MQswCQYDVQQGEwJaQTElMCMGA1UEChMcVGhhd3RlIENvbnN1bHRpbmcgKFB0eSkg
 THRkLjEWMBQGA1UEAxMNVGhhd3RlIFNHQyBDQTAeFw0xMTEwMjYwMDAwMDBaFw0x
 MzA5MzAyMzU5NTlaMGkxCzAJBgNVBAYTAlVTMRMwEQYDVQQIEwpDYWxpZm9ybmlh
 MRYwFAYDVQQHFA1Nb3VudGFpbiBWaWV3MRMwEQYDVQQKFApHb29nbGUgSW5jMRgw
 FgYDVQQDFA9tYWlsLmdvb2dsZS5jb20wgZ8wDQYJKoZIhvcNAQEBBQADgY0AMIGJ
 AoGBAK85FZho5JL+T0/xu/8NLrD+Jaq9aARnJ+psQ0ynbcvIj36B7ocmJRASVDOe
 qj2bj46Ss0sB4/lKKcMP/ay300yXKT9pVc9wgwSvLgRudNYPFwn+niAkJOPHaJys
 Eb2S5LIbCfICMrtVGy0WXzASI+JMSo3C2j/huL/3OrGGvvDFAgMBAAGjgecwgeQw
 DAYDVR0TAQH/BAIwADA2BgNVHR8ELzAtMCugKaAnhiVodHRwOi8vY3JsLnRoYXd0
 ZS5jb20vVGhhd3RlU0dDQ0EuY3JsMCgGA1UdJQQhMB8GCCsGAQUFBwMBBggrBgEF
 BQcDAgYJYIZIAYb4QgQBMHIGCCsGAQUFBwEBBGYwZDAiBggrBgEFBQcwAYYWaHR0
 cDovL29jc3AudGhhd3RlLmNvbTA+BggrBgEFBQcwAoYyaHR0cDovL3d3dy50aGF3
 dGUuY29tL3JlcG9zaXRvcnkvVGhhd3RlX1NHQ19DQS5jcnQwDQYJKoZIhvcNAQEF
 BQADgYEANYARzVI+hCn7wSjhIOUCj19xZVgdYnJXPOZeJWHTy60i+NiBpOf0rnzZ
 wW2qkw1iB5/yZ0eZNDNPPQJ09IHWOAgh6OKh+gVBnJzJ+fPIo+4NpddQVF4vfXm3
 fgp8tuIsqK7+lNfNFjBxBKqeecPStiSnJavwSI4vw6e7UN0Pz7A=
 -----END CERTIFICATE-----
 subject=/C=US/ST=California/L=Mountain View/O=Google Inc/CN=mail.google.com
 issuer=/C=ZA/O=Thawte Consulting (Pty) Ltd./CN=Thawte SGC CA
 ---
 No client certificate CA names sent
 ---
 SSL handshake has read 2005 bytes and written 285 bytes
 ---
 New, TLSv1/SSLv3, Cipher is ECDHE-RSA-RC4-SHA
 Server public key is 1024 bit
 Secure Renegotiation IS supported
 Compression: NONE
 Expansion: NONE
 SSL-Session:
     Protocol  : SSLv3
     Cipher    : ECDHE-RSA-RC4-SHA
     Session-ID: 45F9A9FA76661A382878C54AD89EB033C1D8CABB1840F6C154B32F406EC05D75
     Session-ID-ctx: 
     Master-Key: 11FA086DFD76443E656F2C487A52B4BCF83A3F7B65C390A15FC2D876EE64E1EBF9FD1B9E8A22E5980D77CD86A11B2BE8
     Key-Arg   : None
     PSK identity: None
     PSK identity hint: None
     Start Time: 1331313945
     Timeout   : 7200 (sec)
     Verify return code: 20 (unable to get local issuer certificate)

Then calculate the fingerprint.

> openssl x509 -noout -fingerprint -in cert.pub
SHA1 Fingerprint=59:29:78:A7:2A:90:61:F7:0A:D7:C4:4C:4D:44:9D:CF:25:8C:D5:34

The above fingerprint is different than the one Pidgin was warning me about. In this case I rejected the certificate, told pidgin to re-connect and on the second attempt got a valid certificate.

MySQL generate mysql create command

MySQL can automatically output the command necessary to create a duplicate table. Very useful for copying tables between servers or for doing small modifications between two tables.


SHOW CREATE table table_name;

SMI Experiment Center 360 download link

Link to download Experiment Center and Begaze from SMI. http://www.smivision.com/en/gaze-and-eye-tracking-systems/support/software-download.html

Translating SMI BeGaze error messages

I’m just starting to work with SMI BeGaze and have already run into some non-intuitive messages and problems that took some figuring out. The following is a continuously updated blog post of different confusion points I’ve had and the eventual solution:

This version of BeGase only allows 2 gaze data files per experiment

Translation: You put in the wrong license usb dongle.

If you use the Experiment Center dongle the BeGaze software thinks it is in some sort of evaluation mode and will only allow you to work with a small amount of data. You have to use the correct license key.

Audio not playing or not visible when you know it is there

You know you recorded audio but for some reason BeGaze doesn’t show the audio track and when you play back the video it doesn’t play any audio.

Solution: If you hide the webcam video on the left sidebar the audio also vanishes. To get audio back just expand the “Webcam” tab on the left sidebar. Note that hiding this box makes BeGaze process data a bit faster.

BeGaze does this because the audio isn’t associated with the screen recording, its associated with the webcam file. When you tell BeGaze to hide the webcam it hides the audio as well.

Convert from String to Byte array in C#

To convert from a string to a byte[] in C# use the following code:


byte[] newByteArray = System.Text.Encoding.UTF8.GetBytes("Hello World");

You can use UTF8, UTF16 (Unicode), and UTF32 encoding.

Possible mutations of a Gmail email address

The Blog Senseful Solutions has a good article on How Gmail Filter Email-Matching Works.

To quote them:

The default account you use (e.g. john.smith@gmail.com) will match all variations of your address. This includes dot notation, plus addressing, and using the googlemail.com domain.

Here’s a brief explanation of each:

  • Using dot notation: You can enter as many non-consecutive dots in your email as you want. For example, if your email is john.smith@gmail.com, mail sent to j.o.h.n.s.mith@gmail.com will still arrive at your account.
  • Using plus addressing: After your account name, you can enter the + sign and whatever text you want afterwards followed by the Gmail domain. For example, mail sent to john.smith+foo@gmail.com will arrive at john.smith@gmail.com.
  • Using googlemail.com domain: Any mail sent to your @googlemail.com will arrive at your @gmail.com address. For example, mail sent to john.smith@googlemail.com will arrive at john.smith@gmail.com.

Any of the above can be combined (e.g. j.o.h.n.s.m.i.t.h+foo.bar@googlemail.com will still go to john.smith@gmail.com).